Introduction
Embarking on a DIY handyman, home improvement project can be an exciting venture, but it can also be a daunting task, especially when it involves a delicate operation like removing chipped floor tiles. However, with the right tools, safety gear, and a step-by-step guide, you can turn this seemingly daunting task into a rewarding experience.
The Necessary Tools
Before we dive into the process, let’s take a look at the essential tools you’ll need for this operation. The first on our list is a multi-tool, an indispensable gadget that will serve as your primary weapon in this mission.

Next, we have cold chisels, which are perfect for breaking up the tiles. A hammer or mallet will be your sidekick, helping you to apply the necessary force to the chisels. Trowels, on the other hand, are your best friends when it comes to spreading adhesive and grout.
Safety First
Remember, safety should always be your top priority. To ensure your safety, equip yourself with eye protection, ear muffs, and gloves. These will protect you from any potential hazards that may arise during the process.
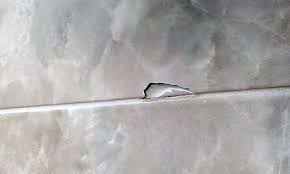
The Process
Now that we’ve got our tools and safety gear sorted, let’s move on to the exciting part – the process! But, don’t forget to lay drop clothes to protect surrounding areas.
Start by using your multi-tool to carefully grind into the grout. The multi-tool is ideal for this kind of operation because it reduces the amount of dust that an angle grinder will produce. However, be cautious not to overstep the mark and damage the adjoining tiles. Grind as far as possible into the grout. Using the multi tool again, score the damaged tiles diagonally. NOTE, you can also apply tape to the affected tile to reduce the chance of splinters flying off.
After grinding, core a few large gauge holes in the centre of the tile with a masonry bit. This will create a point of leverage that you can use to start hacking away with a cold chisel. Begin working from the centre outwards, gradually expanding the hole.
Once you’ve successfully removed the chipped tile, clean out all the old adhesive until the new tile fits flush. This is a crucial step as it ensures that the new tile will sit correctly and not cause any further damage.
Next, secure the new tiles with tile adhesive. Allow it to dry before applying the grout. Choose a grout that matches the colour of the new tiles to ensure a seamless finish.

Finally, don’t forget to clean up the work area. Remove all debris and ensure that everything is tidy. This will not only make your workspace safer but also make the whole process feel more rewarding.
Conclusion
In conclusion, removing chipped floor tiles may seem like a challenging task, but with the right tools, safety gear, and a step-by-step guide, it can be a rewarding DIY project. So, grab your tools, put on your safety gear, and get ready to transform your floor! Any problems, then get in touch with us