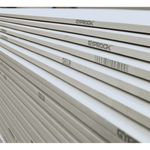
INTRODUCTION TO GYPROC
Gyproc, a type of plasterboard material, is renowned for its ease of installation but often overlooked is its vulnerability to damage. Despite this, repairing a Gyproc wall or ceiling might seem like a daunting task, especially if you’re not well-versed handyman. But don’t worry, this guide will walk you through the process, ensuring you achieve a professional-quality finish that will leave your walls and ceilings looking as good as new. Whether you’re a seasoned handyman or a DIY enthusiast, this guide is for you!
THE PROCESS: THE FIRST STEPS
To start, you’ll need to set up a workstation. Lay down a drop cloth to catch any falling debris and gather your tools. The first order of business is to square off the hole in your Gyproc wall or ceiling. Use a drill to create holes at each of the corners of the hole. Once the corners are marked, it’s time to remove the damaged board.
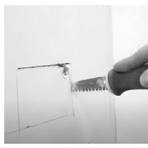
Utilize a keyhole saw to cut out the damaged board. Ensure that the hole is neat and square. After the damaged board is removed, measure the diagonal of the hole. Cut a piece of plasterboard that’s just a tad smaller than the diagonal measurement. This will ensure a snug fit.
Now it’s time to prepare the backing board. Drill two holes in the plasterboard and push two 4-inch nails through these holes. The nails, with their pointy ends sticking out, will serve as grips to help insert the backing board.
NEXT
Next, smear a generous amount of cornice cement on the backing board and insert it diagonally into the hole. Use the nails as grips to pull the backing board firmly into place. This will ensure good adhesion. Scrape away any residual adhesive and let it dry.
Once the cornice cement has dried, you’ll need to measure the opening and cut a piece of Gyproc that’s just slightly smaller than the opening. Apply cornice cement to this piece and press it evenly onto the backing board. Overlap the joins with fibreglass joint tape to ensure a strong bond.
The final step is to apply joint compound over the jointing tape. Start by feathering it out gradually from the center, working your way outwards. You may need to repeat this process to ensure a smooth finish. Once the compound has dried, lightly sand it flush with the surrounding surface.
After sanding, it’s time to prime and paint. Apply two coats of paint to match the existing color. This will help blend the repaired area seamlessly with the rest of the wall or ceiling.
NOTE:
If you can’t find a match for the existing paint, don’t worry. Scrape off a decent-sized sample of the existing paint with a sharp knife or chisel. Take this sample to the Bunnings paint department, and they will match the colour for you.
This method has proven effective in hundreds of plasterboard patching projects I’ve undertaken. I follow the same process every time because it works!